1 How it all works
The site has three independent things that are easy to confuse. Keep this scheme in mind — everything else will fall into place.
Settings
City, time zone, houses, planets, theme. Stored in your browser and, once you sign in, synced with your account.
Chart database
Your charts, in folders. Stored in your browser (the “db” key) and, with Pro, also in the cloud so you can move between devices.
Calculation
Natal chart, transits, synastry and the calendar are calculated with Swiss Ephemeris. No account is needed for calculations.
The main rule. Settings first (city and time zone), then the chart in the database, then the calculation. If a calculation looks off, it is almost always the time zone or a wrong city.
2 Sign-up and sign-in
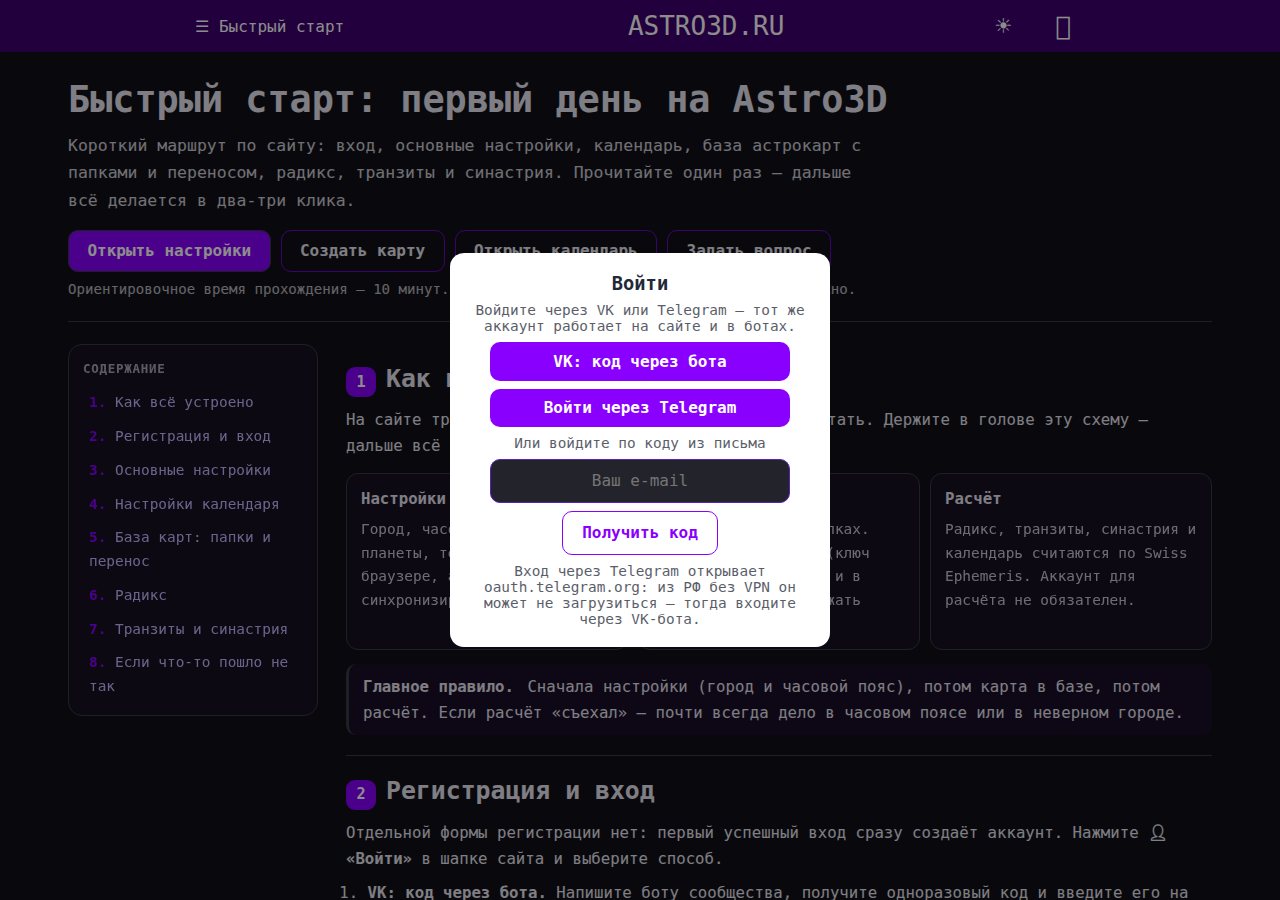
There is no separate sign-up form: the first successful sign-in creates your account. Tap 👤 “Sign in” in the site header and choose a method.
- VK: a code via the bot. Message the community bot, get a one-time code and enter it on the site.
- Telegram. Open the bot, get a code and enter it. From Russia oauth.telegram.org may fail to load — use the VK bot then.
- A code by e-mail. Enter your e-mail, get a message with a code and enter that code. The most independent way.
All methods lead to one account, but only if the contact is the same. Signing in via VK and via another e-mail creates different accounts.
What signing in gives you
- Your account, payment history and support requests in your personal account.
- Settings synced between your browser, phone and other devices.
- A Pro trial for new users and a starting AI balance — exact terms in your account.
- The chart cloud and AI chat — already part of Pro, trial period included.
How guest, Free and Pro differ
| Feature | Guest | Free account | Pro |
|---|---|---|---|
| Calculations: natal chart, transits, synastry, calendar, 2D/3D | ✓ | ✓ | ✓ |
| Chart database in the browser: folders, moving, copying, JSON file | ✓ | ✓ | ✓ |
| Site settings | in the browser | + sync | + sync |
| Articles, AstroWiki, daily forecast, support | ✓ | ✓ | ✓ |
| Payment history and requests in your account | — | ✓ | ✓ |
| Chart cloud | — | download your database only | save, edit, encrypt |
| AI chat with charts and a message limit | — | — | ✓ |
| Newsletters, custom prompts, ZET import | — | — | ✓ |
“Free account” means being signed in without an active Pro. A new account automatically gets a Pro trial; after that Free applies until you subscribe to Pro. On Free you can only download the cloud database (if it is not encrypted); saving and editing need Pro. The full plan line-up and prices are on /tariffs.html.
Code not arriving? Check “Spam” and “Promotions”, start a conversation with the bot and request a new code (the old one stops working after that). Still stuck? In the support chat open “Help me sign in”: you can call a human there, and it doesn't use up your message limit.
3 Main settings
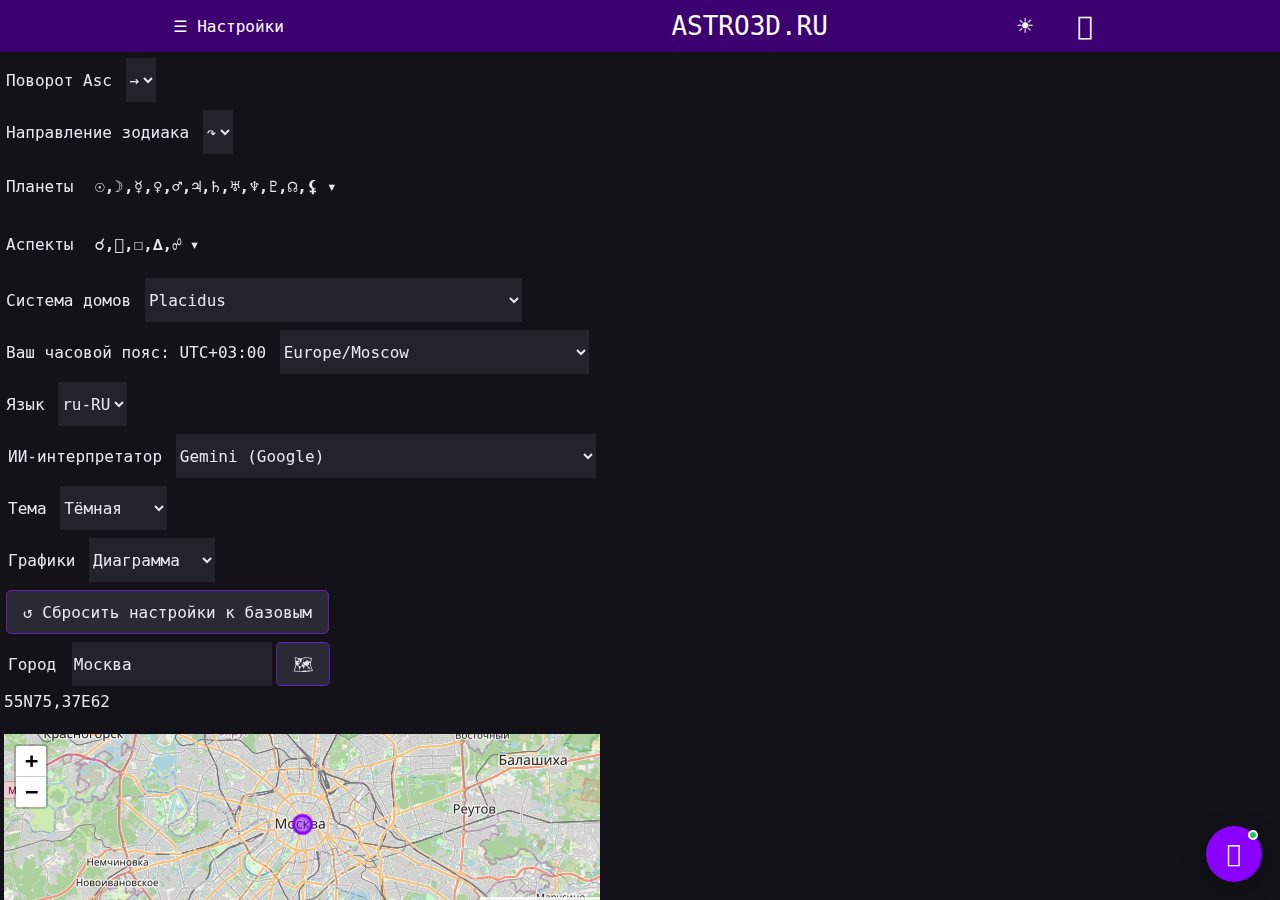
The /setting.html page is your control centre. Open it from the “More” menu or by direct link.
- City. Start typing a name and pick a suggestion — coordinates and the time zone are filled in automatically. The 🗺 button opens the map.
- Time zone. Check it after choosing a city. Houses, calendar event times and transits depend on the zone.
- Houses, planets, aspects. What to show in calculations. You can also change this quickly on the calculation pages.
- Theme and language. Light, dark or follow the system; interface language.
- Charts. “Image” is a static picture, “Diagram” is interactive (you can hover and zoom).
- AI interpreter. Where to send the chart text: ChatGPT, Claude, Gemini, DeepSeek and others. ChatGPT by default.
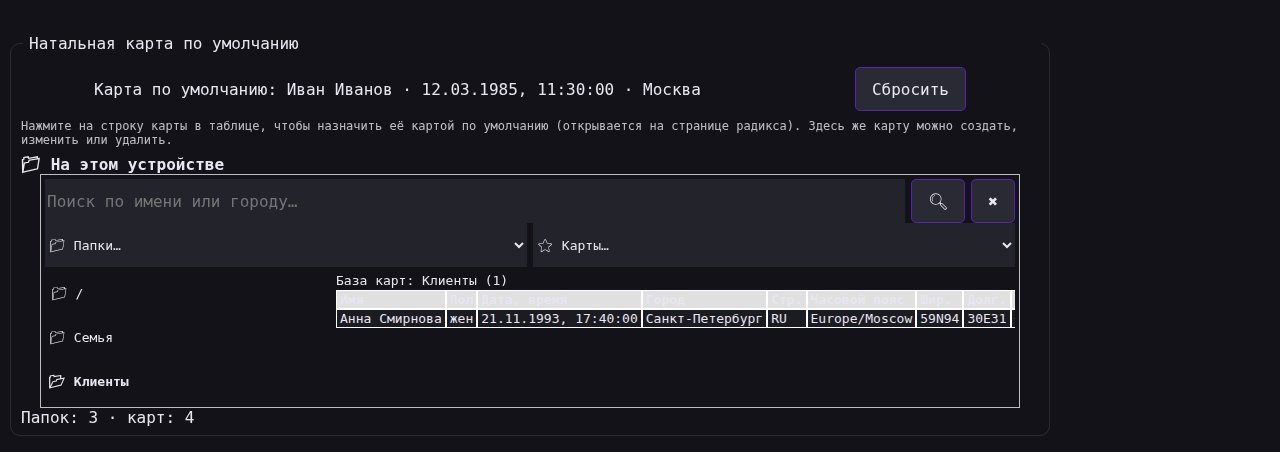
- Default chart. Click a chart row in the table — that chart will open on the natal page and be pre-selected in the calendar. The “Reset” button clears the choice.
Reset to defaults. This only resets settings. Charts, payments and your plan are not deleted, so the button is safe to use.
Settings are stored in the browser and synced to the server when you are signed in. If another device shows different ones, check that you are signed in to the same account and reload the page.
4 Calendar settings
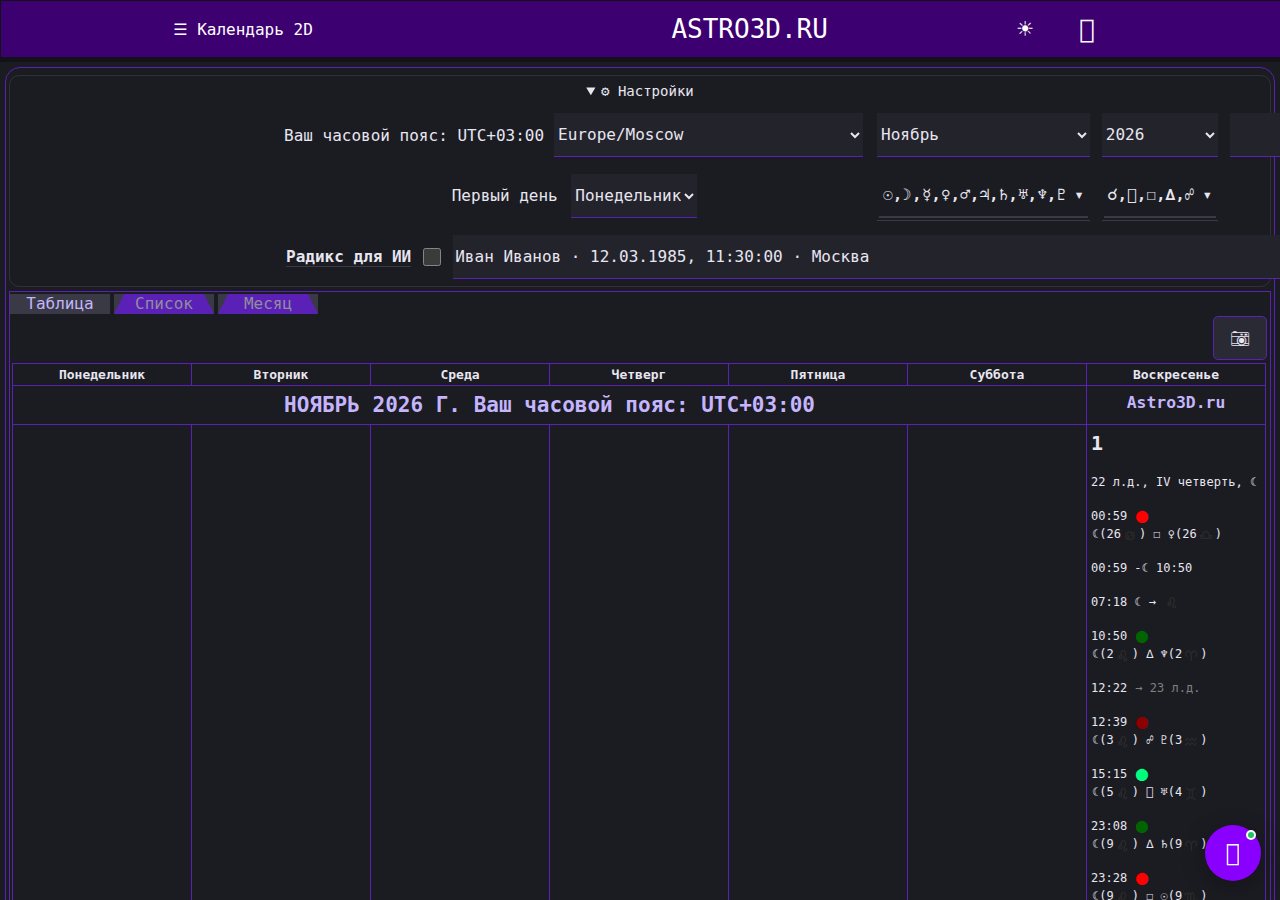
The calendar lives on a separate page /calendar2D.html. It has its own toggles — they do not change the site-wide settings.
- Time zone. The calendar has its own selector: events are shown in that zone. If the time looks off, compare it with the settings.
- Month and year. Pick the period you need; the list updates.
- First day of the week. Monday or Sunday — whichever suits you.
- Planets and aspects. What appears in the grid and in the event list.
- Natal chart for AI. The checkbox adds your default chart to the AI text. The chart itself is set in Settings by clicking its row; choosing a chart on the natal or transit page does not change the default.
- Three views. The “Table”, “List” and “Month” tabs show the same period in different ways.
- Export. 📷 saves the month as a picture, “Copy month JSON” puts the data on the clipboard, “Download month .txt” saves it to a file.
On a phone the calendar opens as a list right away — that is handier for reading events without horizontal scrolling.
5 Chart database: folders, charts and moving
The chart database is your list of people and events the charts are calculated for. The “📁 Folders… / ⭐ Charts…” panel is available on the settings page, on the natal page, in transits, synastry, the 3D natal view and astrocartography. In your account it is shown as two blocks: “on this device” and “cloud”.
Folders
- Open the menu “📁 Folders…” and choose “➕ New folder”.
- Type a name. A new folder is created inside the current one — that is how nesting works.
- “✏️ Rename folder” and “➖ Delete folder” apply to the current folder. Deleting a folder also deletes every chart in it, so the site asks for confirmation first.
Charts
- Add: “⭐ Charts…” → “➕ Add chart”. Fill in the name, sex, date, time, city, coordinates and time zone. If the birth time is unknown, enable “cosmogram” — the time is set to 12:00 and houses and the Asc are not calculated.
- Edit: select a chart in the table and click “✏️ Edit chart”.
- Delete: select a chart and click “➖ Delete chart”. A prompt with the name appears — confirm if you really mean it.
Deletion is permanent. Before cleaning up the database, make a backup: “⭐ Charts…” → “💾 Save database to file”. The JSON file can be loaded back on this or another device.
Copying and moving
- Copy: select a chart → “⧉ Copy chart”.
- Paste: go to the folder you need (or to the other “cloud/device” panel) → “📋 Paste chart”. The clipboard is shared by all panels on the page.
- Move: select a chart → “➡️ Move chart…” → pick a folder. The chart disappears from the old folder and appears in the new one, with no duplicates.
- Import from file: “📀 Load database from file” replaces the current database with the JSON data. Save a copy first.
ZET import is available on Pro and in the admin area: the file must be windows-1251 encoded with “;” separators (name; date; time; zone; place; latitude; longitude; sex). Duplicates by name and moment are skipped, and the charts are placed in a folder named after the file — you can choose the browser cache or the cloud.
The cloud and moving to another device
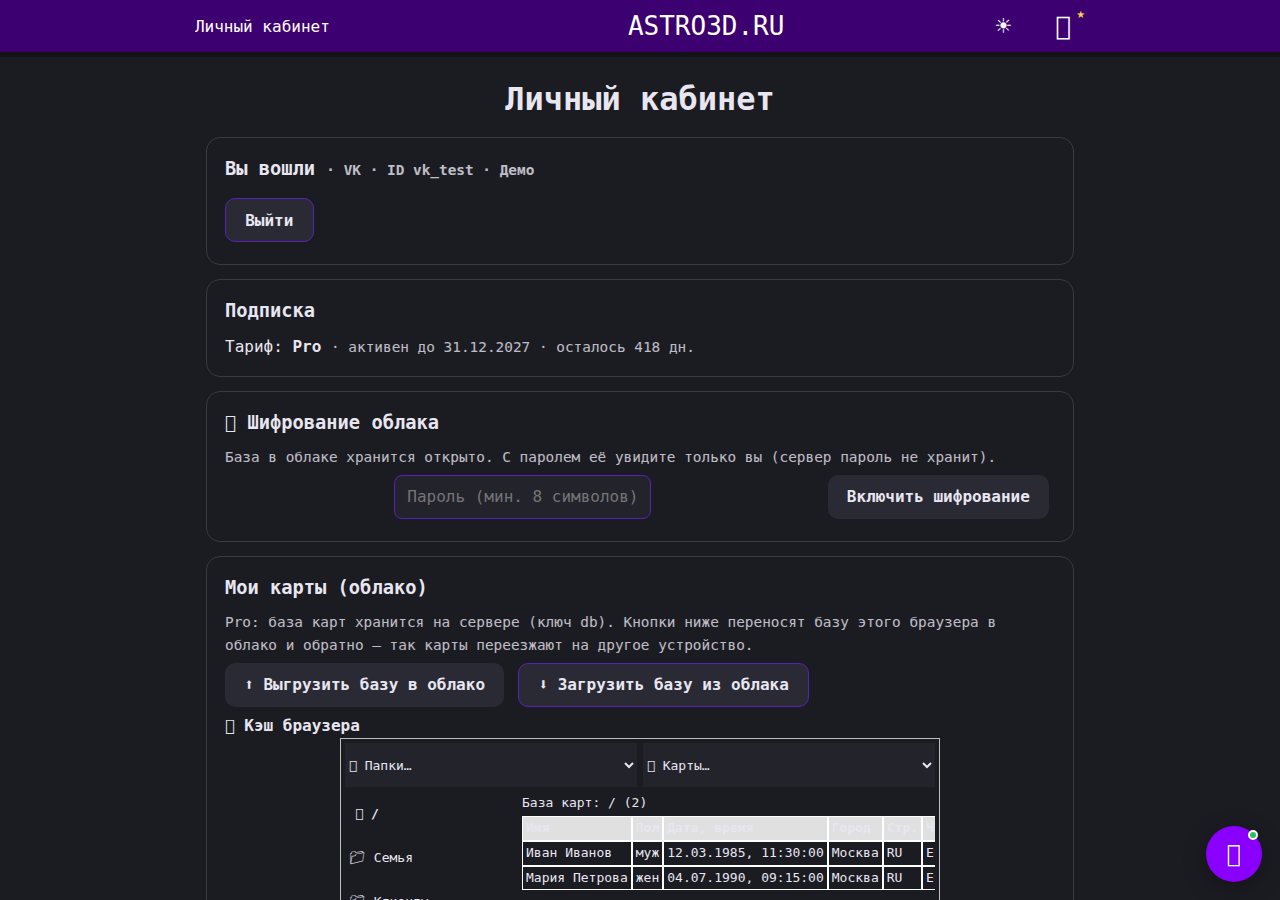
- Open /cabinet.html and find the “My charts (cloud)” block.
- ⬆️ Upload the database to the cloud — send this browser's database to the server.
- ⬇️ Download the database from the cloud — replace the browser database with the cloud version.
- Editing the cloud and the chart panel in your account require Pro. Without Pro the account shows “Pro required”.
Cloud password. If you enable encryption, the server does not store the password. If you forget it, the cloud cannot be decrypted. Keep it somewhere safe, and back up to a file before enabling encryption. More — in AstroWiki.
6 Natal chart: settings and calculation
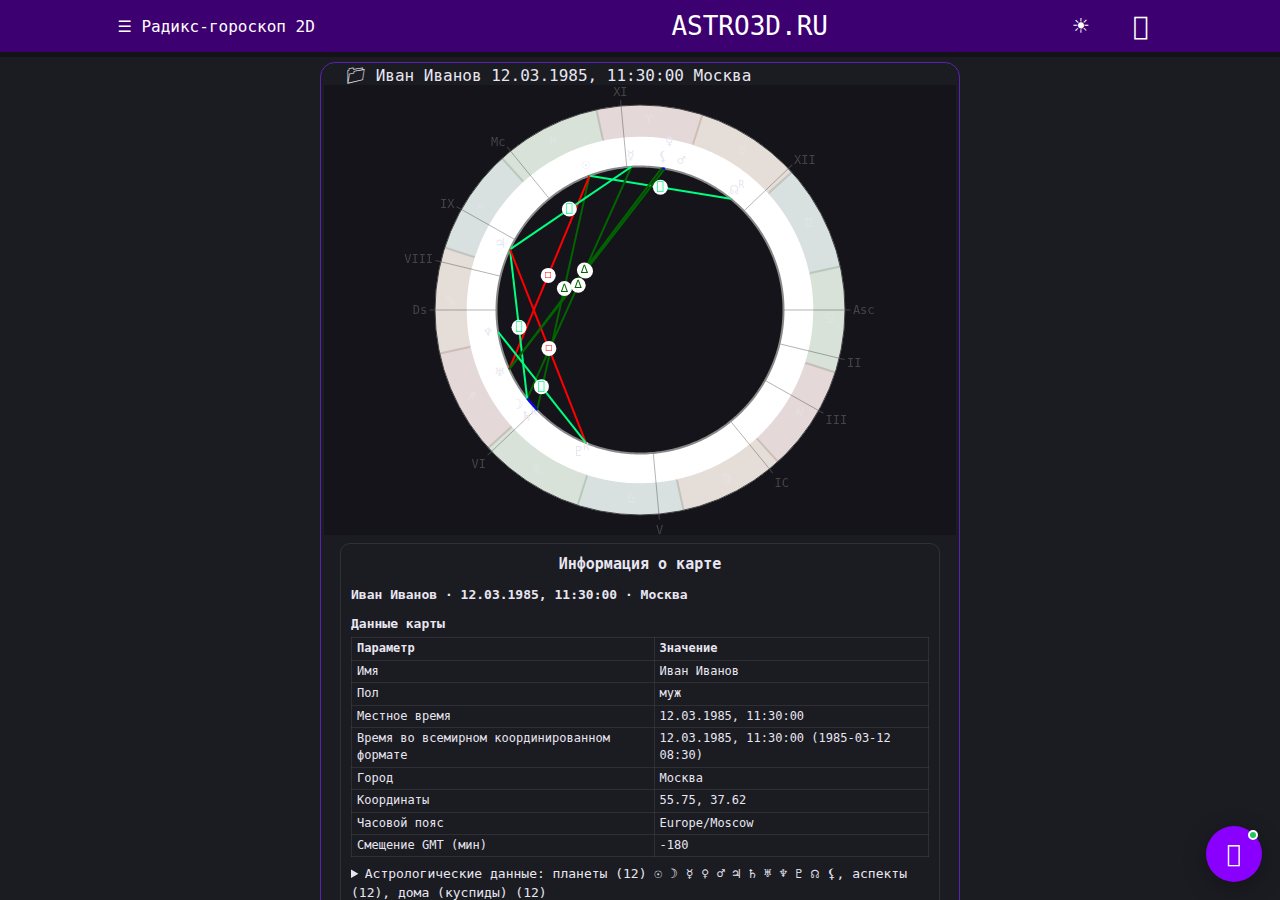
The natal chart opens on /radix2D.html. You don't need to re-enter any data — the chart comes from the database.
- Expand the “DB” block (the legend with the 📁 icon), pick a folder and click a chart row.
- If a default chart is set, it opens automatically — there is nothing to choose.
- Planets, aspects and the house system come from the general settings. Quick toggles sit right above the chart: they only change the current calculation.
- “Chart info” appears below: coordinates, houses, aspects and the text for AI.
- You can save the chart as a picture (PNG), copy the text or send it to the AI interpreter.
- The 3D version is /radix3D.html: the same chart, but in 3D.
If the birth time is approximate, enable the cosmogram in the chart editor: the site will not treat houses, the Asc and the MC as exact.
7 Transits and synastry
Transits
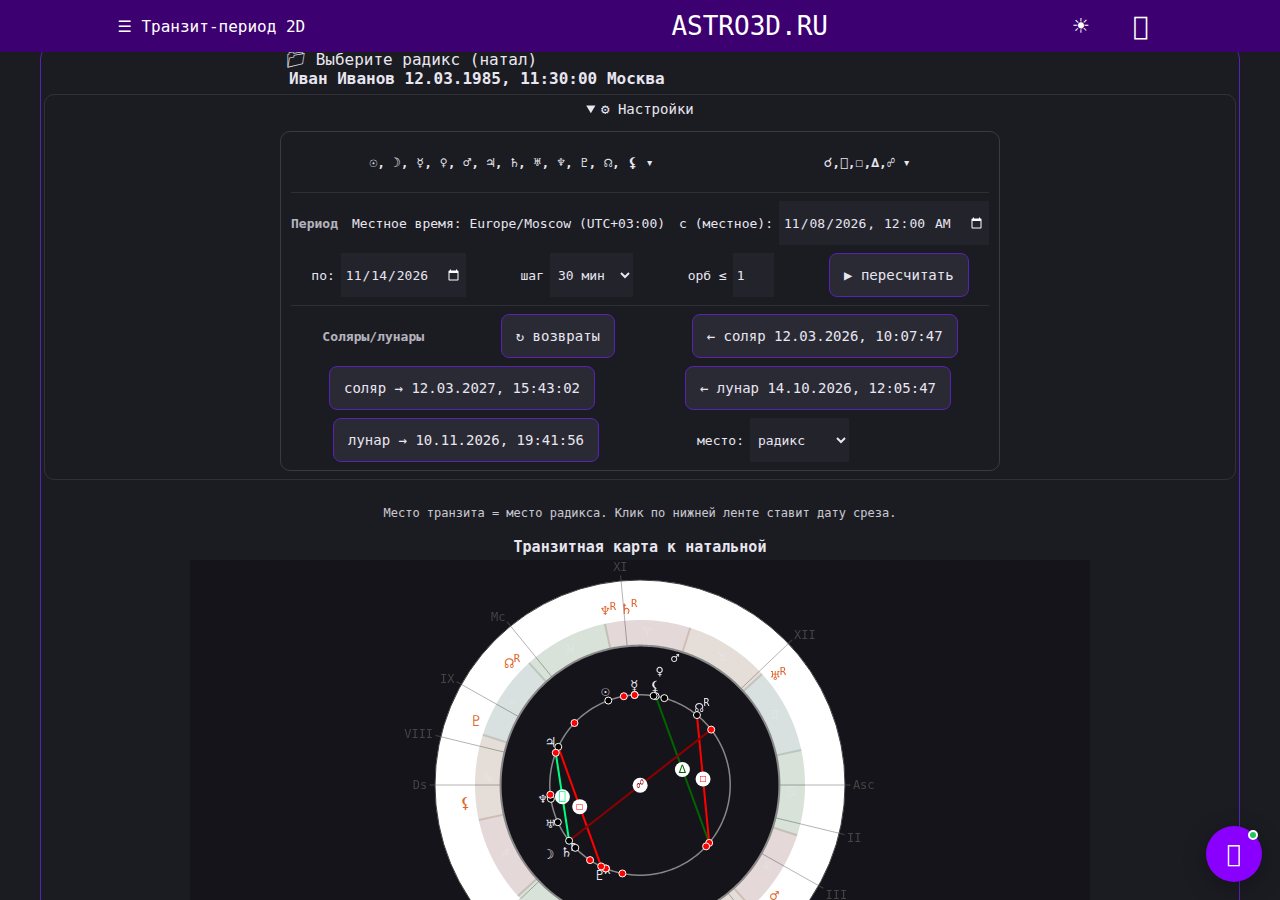
- Open /transit2D.html and expand the “Choose a natal chart” block — click a chart.
- Set planets and aspects, the “from / to” period, the step and the orb. A smaller step takes longer but is more precise.
- Click “▶ recalculate” — the transit wheel and the period strip appear.
- Clicking the strip (or the “Date” slider) sets the transit date and rebuilds the wheel.
- Returns: “↻ returns”, then “← solar”, “solar →”, “← lunar”, “lunar →”. The place can be taken from the natal chart, or you can enter relocation coordinates.
All period dates use the local time from your settings. The transit place matches the natal place.
Synastry
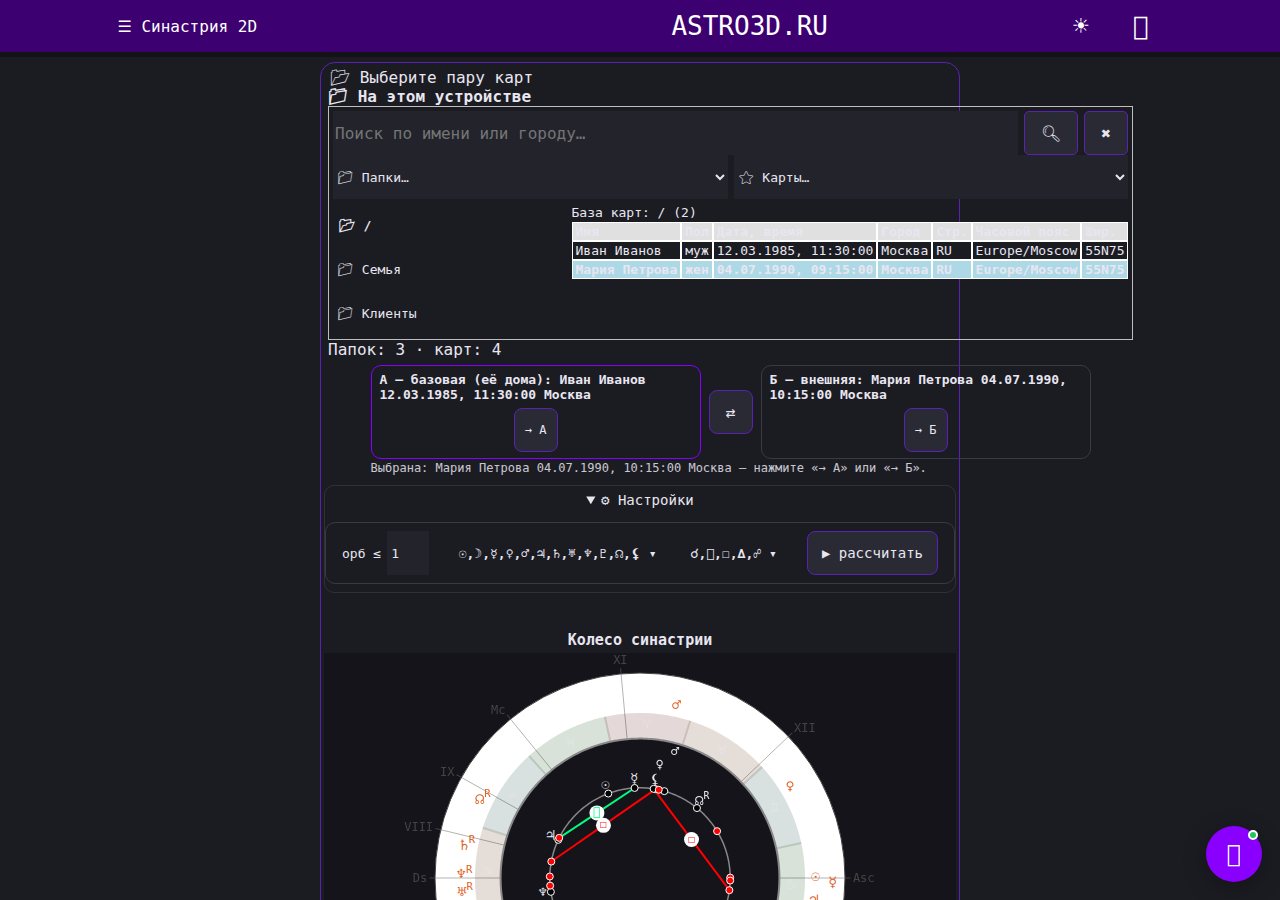
- Open /synastry2D.html and expand the chart database.
- Click the first chart in the table → “→ A”. This is the base chart: its houses form the inner circle.
- Click the second chart → “→ B”. The “⇄” button swaps the charts.
- Set the orb, planets and aspects, then click “▶ calculate”.
- The wheel and the text appear below: B's planets in A's houses and the cross-chart aspects.
8 If something goes wrong
| Symptom | What to do |
|---|---|
| The city is not saved | Check that you are signed in, pick the city from the suggestions (don't just type the text) and press “Save” again. |
| Settings differ between devices | Sign in to the same account and reload the page. Syncing takes a few seconds. |
| The calendar time is off | Compare the time zone in the calendar with the one in the main settings — these are two different selectors. |
| The chart looks wrong | Check the date, time, city and zone. If the birth time is unknown, enable the cosmogram. |
| The chart database is empty | The charts may have stayed in another browser. Sign in and load the cloud or import the saved JSON. |
| “No permission to edit the cloud” | The cloud panel and editing require Pro. Without Pro your account shows a “Pro required” hint. |
| The sign-in code doesn't arrive | Check “Spam”, start a conversation with the bot, request a new code. Then use “Help me sign in” in support. |
| A period calculation takes very long | Increase the period step (for example from 1 hour to 1 day) or shorten the date range. |
| No houses are shown | Most likely the cosmogram is on, or “no houses” is selected in the settings. That is normal for an uncertain birth time. |
Didn't find an answer — AstroWiki and the reference contain detailed articles, and the support chat answers right away.
First-day checklist
- Choose a city and check the time zone
- Create a “Family” or “Clients” folder
- Add at least one chart
- Set the default chart
- Look at the calendar for the current month
- Export the database to a file or to the cloud
All set? Then open the natal chart or the calendar — and enjoy.